

Partner Content
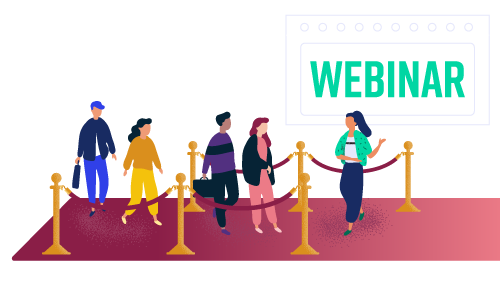 Creating a trade show experience in a digital environment is a complex undertaking. It requires a lot of planning and demands a fairly sophisticated webinar platform and mature webinar marketing program.
But there’s a lot of potential upside to running such an event. First, it helps you to reach more audiences than you’d be able to in person. Second, it helps you collect and analyze every interaction — helping you to gain further insights into your audience and drive revenue. Third and finally, they just look cool.
There are a few prerequisites to meet before creating a virtual trade show with webinars. So, it helps to have the following resources handy for at least your first foray into the live digital trade show experience:
Tools
- A sophisticated webinar platform.
- Design skills and tools.
- Video editing software and skills.
- A project manager or management tool.
Personnel
- Demand Generation Specialist.
- Design Specialist.
- Webinar Producer.
- Webinar Presenter.
- Sales Representative.
Process
- A content calendar.
- An experience map for the event.
- A content brief.
- Scheduled practice time.
- A list of CTAs and interactive features you’d like to include.
Before you run a trade show experience, you’ll need to dedicate some time to planning. During this phase, you’ll need to sit down with your team to discuss roles, responsibilities, design needs and more.
We recommend you start with your timeline. Generally, start your planning at least a month ahead of your first virtual trade show experience. You will need at least two weeks for design alone — from ideating to lining up final assets — and you should plan to practice at least twice before going live.
Develop a trade show Theme

Make sure audiences know they’re entering a whole new experience with a well-defined theme that carries through to your design and tone.
At ON24, we created “Beyond the Webinar,” a virtual trade show showcasing the breadth of what the ON24 Digital Experience Platform has to offer. We wanted to carry that theme through and decided to emulate the experience you’d get at trade shows. So, we create a virtual booth that attendees could visit and interact with.
Take a look at the virtual booth console below:

Your needs may be different. So, regardless of whether you’re looking to create a virtual booth, a virtual exhibit or plan to use digital experiences to amplify your hybrid events, sit down with your event organizer and establish a few goals that you can use to inform your theme.
After settling on a theme, it’s time to map out how your trade show should flow.
Identify Your Trade Show Elements

Trade shows usually follow a familiar format: attendees arrive, attend a keynote presentation and then either breakout into different rooms for in-depth discussions or hit the trade show floor to see what solutions are available and talk to vendors.
Translating the trade show experience into a digital environment means cutting everything down to the bare essentials for a particular audience. At ON24, we decided there would be two main groups of attendees — prospects and customers — to create experiences for.
So, what elements did we include to target these two audiences? Fortunately, there is a good deal of overlap between the two. We settled on a flow like this:
- 1. Beyond the Webinar Mainstage
- 2. Beyond the Webinar Aftershow
- Aftershow for Prospects
- Aftershow for Customers
- 3. Use case Experiences
If we were to compare our virtual trade show experience to a user conference, then the “Beyond the Webinar Mainstage” would be the keynote speech and the “Beyond the Webinar Aftershow” would be the exhibitor booth.
Now, those two main elements — the mainstage and aftershows — have a lot of dependencies to consider. If you’re thinking of emulating this experience, sit down and ask yourself a few questions, like:
- What assets and/or resources do you have available for your experience?
- What branded content will you include in the keynote over the aftershow?
- How will you get attendees from the mainstage area into your aftershow experiences?
- How will you segment audiences into their respective experiences?
- What interactive features will you include in your mainstage experience? Your aftershow?
- How will you involve your sales team in the process?
- How will you use this experience to inform future content?
- Who on your team will do what during the event?
- How will you track success and what KPIs are you aiming for?
As you can see, the questions you’ll need to answer can get fairly complex fairly quick. So, it’s in your best interest to plan out your experience as far in advance as possible.
For us, we wanted to get as close to a trade show experience as possible, so we set aside some of our marketing experts to answer questions during the Aftershow Experience through a live Q&A.
We also teamed up with our sales department to have a few sales representatives on standby to answer any in-depth questions an interested attendee might have. They were also on standby to book virtual meetings for anyone ready to convert on the spot. To do this, we made use of our platform integration with the Drift chatbot.
For our experience, the overall flow of the conference program for an attendee is:
- Register.
- Join the live mainstage event.
- Join the Aftershow Experience.
- Click through to a Use Case Journey.
- Interact with the sales team.
- Either leave the experience or set up a meeting.
So you can see that while the flow is fairly short, there are a lot of dependencies we need to accommodate. A quick rundown shows us the scale of what’s necessary:
- Keynote presentation and slides.
- Engagement tools and downloadable resources.
- CTAs driving to Aftershow Experience.
- Aftershow Experience layout and CTAs.
- Use Case Experiences.
- Chatbot playbooks.
- Sales training.
That’s a lot of stuff to prepare! Fortunately, you’ll nail your virtual trade show with a great plan.
Develop Your Plan

Virtual trade show planning may seem intimidating, but when you break it down to its constituent parts, it’s not too bad. Here’s how we recommend you approach your digital event planning at ON24:
Nail Experience Flow
First, make sure your marketing team agrees on the essential elements of your trade show experience. This should take place about a month or two in advance of your planned launch date.
We’ve mapped out a few trade show elements above, but, in general, you’ll want three core items:
- A main keynote experience.
- A post-keynote activity.
- Breakout options for sales and high-signal prospects.
Talk with your team and come up with a few ideas for your keynote topic. You’ll also want to discuss what you want your post-keynote experience to cover and if you’ll want to segment your audience for post-keynote experiences.
Create Experience Maps
One way of keeping on track — and making sense of all of your different environments — is to create a set of experience maps. The first maps should be a representation of your event’s flow.
This does not have to be an especially complicated map. Really, a simple slide will suffice.
For example:

That’s one map. But you should also have a map highlighting all the area within an interactive environment that an attendee can click and interact with. For example, here’s a map of one of our “Beyond the Webinar: Live Aftershow Experiences” with interactive features highlighted.

In it, you can see all elements an attendee can click on. To create your own map, simply create a blank slide and fill it in with the interactive elements you’d like to include:
For the above example, these elements would translate to:
- Media player
- Chat
- Q&A
- CTA 1
- CTA 2
- CTA 3
- Engagement Tool Bar
Having this map will help your design team get a better understanding of what they have to work with and help your webinar production team know where they need to place each element.
Set Up The trade show Experience
Okay. So you have your console map, a theme and design figured out. Now, it’s time to set up your experience. Fortunately, this is fairly easy to do, especially once all of your design pieces are in place.
Here’s what you’ll need to do.
Step 1. Create a new webinar.
Log into ON24 Webcast Elite and click on “Create a Webcast+”

Enter all of the information — from title to time to campaign code — you’ll need. If you’re asking the audience to go from one live event to your new experience, you should schedule your experience to go live two to three minutes before the first event ends.
Step 2. Upload your console background
Go to Console Builder and click on “Console Customization” (the gear icon) in the Console Builder Bar.

Now, under “Console Background,” click on the “image” selection and upload the console background.

You’ll also want to click on “Constrain Image Proportions” to ensure your console background does not stretch and change clickable elements if an attendee decides to expand your experience.
Step 3. Create and place transparent images
Okay, now it’s time to create what your audience will actually click on. To do this, we’ll make use of transparent, clickable images.
- Click on the “Tools Manager” in the Webcast Elite Console Builder Bar.
- Scroll down to the “Image” tool under “Engagement.”
- Add the image and adjust its size using the four corner dots.
- If you need your transparent image to not be locked to an aspect ratio (as in, you want the transparent image to be a rectangle rather than a square), then click on the gear icon in the upper-righthand corner or your image, select “attributes” and deselect “Lock Aspect Ratio.”

- Make sure transparent images are marked to be “active” and “show on launch.”

- If your experience goal is to link to new experiences or provide CTAs, make sure your transparent images link to your destination.
- Click the gear icon on your transparent images and then click on “configuration.”
- From the drop-down menu, select “custom URL.”
- Enter your destination URL into the field.
- Click “save.”

And that’s about it! Your trade show experience is set up and ready to go. All that’s left now is to actually run it.
Schedule Practice
But before you run your live event, we recommend having one or two practice runs to make sure everyone who is touching this event knows where they need to be and when.
Usually, this means coordinating between two teams: your marketing team and your sales team.
Members on your marketing team will likely fall under one of two roles: presenter or producer. If a team member is a presenter, then make sure their presentation is ready a few days before the event.
Have your presenters run through the event once or twice, making sure they know how to move from environment to environment and how to navigate the backend of a webinar.
Your producers — the marketing team members queuing up videos, slides and questions from the audience — should also be on the same dry run so they can identify any potential issues with the setup or uploaded media and practice queuing up questions to presenters.
Your sales team will have a different — but similarly crucial — role in the event: they’ll directly interact with your attendees.
How sales actually interact with your attendees depends on how you set up your event. With ON24, you can create CTAs that’ll connect attendees to salespeople via email, use Q&As to direct questions to your sales team and more.
For our “Beyond the Webinar: Live Aftershow” event, we used our integration with a Drift chatbot to facilitate a live 1:1 conversation like you would at a physical event.
Regardless of your approach, create a brief for your sales team and run them through the event at least once.
Run the Event

Running an immersive experience, like a virtual trade show, will take a degree of coordination — especially if you’re pushing from a live webinar.
If you’re going to push attendees from a live webinar to an immersive experience, you’ll need to do three things:
Create a Pop Up CTA
Your host should make references to your post-webinar experience throughout the live event. Still, your audience will need to click through a CTA to enter the actual post-keynote event.
With Webcast Elite, you can create a “Pop Up” call to action banner. What this does is simply have a “Take Action” Engagement Tool pop up towards the end of an event to encourage your attendees to take the next step in their content journey.
You’ll need to do this during your initial setup for your keynote event. You’ll need to select the “Take Action” tool from the Tools Manager, which can be found in the Console Builder bar.

Under “Configuration” click on “Show automatically on webcast end.” Once selected, upload your image and enter your CTA Text.
After copy is entered, go down to “Button Action” and select “Webcast” from the dropdown menu. Then enter your immersive event’s audience URL in the “Audience URL” field.
As a side note: make sure the CTA matches the theme and tone of your immersive experience – you’ll want to make sure your audience knows it’s a brand-new event.
2. Provide Some Time
Your audience will need time to move from your live webinar to your post-keynote event. In some cases, your presenter will also need time to move from the live keynote experience to a new post-keynote experience.
To create a buffer, set your post-keynote experience to go live two to three minutes before the end of your live event. This will ensure the post-keynote experience is both live and that attendees can start logging in.
Once your post-keynote event is live, set expectations by providing a countdown to when it formally starts.
At ON24, we’ve used a pre-roll clip before an “After the Webinar” experience that counts down to the show’s beginning and allowed us to list out the different activities participants can engage in — like Q&A and group chat.

With a countdown in place, you should have enough time to get your presenter from one event to another and fill out the number of participants in the post-keynote experience.
3. Change up your pacing.
Most post-keynote experiences will have a different tone and emotion to set, so change up your presentation pacing, or Q&A style, to hit that different note. For example, in “After the Webinar” Mark Bornstein, our event host, takes a tea break — complete with a Tea Cam.

For complex scenarios like this, you’ll need to have a producer to ensure the post-event experience goes smoothly. Set aside some time between your presenter and producer to practice transitions and queuing up questions to make sure the live event goes smoothly.
A quick note on Q&A v. Group Chat:
ON24’s Q&A and Group Chat Engagement Tools can help make responding to your audience a lot easier — so long as they’re used right. Designate a sales or marketing representative to monitor the Q&A and leave group chat to your audience. This way, you can have a team member capture and raise solid questions to the presenter without having to navigate an overwhelming chat log.
Enjoy the Experience
Okay! So your post-keynote experience is up and running. It’s time to engage! Make sure your presenter lists out housekeeping items like calling out specific CTAs and activities before diving into the meat of the post-event experience.
When the event is finally over, make sure you meet with your respective teams to consolidate feedback and plan your next event.
It should be smooth sailing from here on out. Treat the rest of the post-event experience like a normal webinar and have fun!